Friday, September 21, 2012

Creative Cat Door


Meet Betty, a cute, cuddly, ball of feline fun.  I ADORE this cat.  So what's the problem? Her litter box. Specifically, the fact that wherever we put the litter box, our darling dog manages to find it and indulge in a snack...

To summarize: 1) we LOVE our cat 2) our dog enjoys eating "kitty crunchies" 3) we need a litter box solution

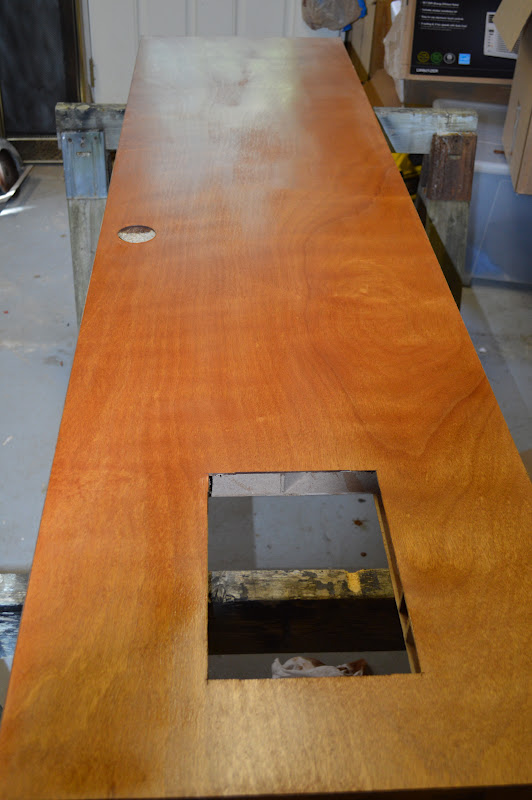
The solution was to put a cat door in one of our closets.  This could have been a quick fix of cutting a hole in the door and installing a prefab cat door, however, we have these beautiful solid wood doors in our home that we could not bear to chop.  Solution: Buy a cheap, hollow door for $20 and chop a hole in it!

Before my husband and dad cut the hole in the door, we creatively measured the size of our slightly obese cat.  Once the hole was cut we were able to stain the door.
This MinWax PolyShade stain in Antique Walnut was the closest match to the other doors in our house.  Make sure you give the stain at least 6 hours to dry before working on the door.
 Starting to look pretty good!  Now it's time to make the cat door.  I went to home depot and bought a piece of decorative trim and asked my dad to cut four sides to make a frame for the door. I used a spray primer before adding color.
 I found this awesome decorative paint by Martha Living.  I wanted something funky and decorative but not too bold that was an eyesore.
Once the paint was dry it was time to attach the frame to the door.  Because the cheap door was hallow, we decided to use glue instead of nails because we did not want to splinter the wood.  Elmer's Carpenter Wood glue worked great. 
***Make sure you do NOT attach the top piece! We will need it later when we attach the fabric flap!
Set the frame in clamps so that the glue dries while the frame is tight. While you wait for the glue to dry it's time to make a cloth door!

Disclaimer: I am NOT a seamstress! My sewing skills are minimal. My stitches are not straight. But hey, this is for a cat door and I don't think little Betty will judge me.  

I chose a fabric that was complimentary with a dash of character.  After measuring the size of the door opening, I added a 1/2 inch and folded over.  After I had ironed the folds, it was time to sew.  
Once the flap was done, we used a staple gun to attach the fabric flap to the top frame piece that we did not attach earlier.  Once the flap was stapled, we just had to glue the top piece to the door. 

Once the decorative door is dry, all that's left is to attach the new door to the door frame.  We used the hardware from our old door so we didn't have to buy any new hardware.

My work here is done.

M. 

Tuesday, September 11, 2012

Easy Organization for the Unorganized Artist


This DIY is for the busy crafter.  A quick & easy DIY that will take your art space (playroom, office, garage, etc.) from boring and blank to bright and colorful!

You'll need:
   Plastic bins
   Spray Paint
   Chalkboard paint
   Painter's Tape

I had these boring, clear, plastic bins that I got for about $1 each.
If you have read other posts that I've done, you know that I am a firm believer in the power of Spray Paint.  For this project, you'll need a spray primer and some fun colors.
Grab your drop cloth and start spraying!
Once the paint was dry, I taped off a section with painters tape.  Once the tape was down, I sprayed Chalkboard paint to make a space to write labels.  Once everything was dry all I had to do was fill the bins and place them on shelves! Viola! Insta-Chic way to revamp your space!


Just check out the difference this quick project made in changing the feel of this space:

Have fun!
-M.


Friday, September 7, 2012

Buy Prints and Products!

Now you can buy art prints and iPhone and laptop accessories featuring my artwork!

On my blog: visit the Prints & Products tab


Society6 is a company that produces prints and products on behalf of the artist.  It is a wonderful site with AMAZING art. Be careful, it can be as addictive as Pintrest, Etsy, and Craftgawker....best look when you have a morning off to enjoy with a cup of Joe and be ready for tons of great art!


Related Posts Plugin for WordPress, Blogger...